> ## Documentation Index
> Fetch the complete documentation index at: https://about.sendforsign.com/llms.txt
> Use this file to discover all available pages before exploring further.
# Implement server side
> Get started with Sendforsign API.
No matter what integration type you will choose for your Client-side implementation, there are some
certain steps that can be only implemented on your backend. Please note that this tutorial shows code snippets
for each step in JSON, while the exact implementation depends on the programming language and framework you use
for your server side.
## Server Side
From the server side perspective, you need to create several fundamental objects:
* Get a platform API key and Secret (representing your platform).
* Generate a platform token.
* Create a client for each business that use your platform.
* Generate client tokens.
* Create client users for each end-user of the businesses on your platform.
## Get a platform API key and Secret
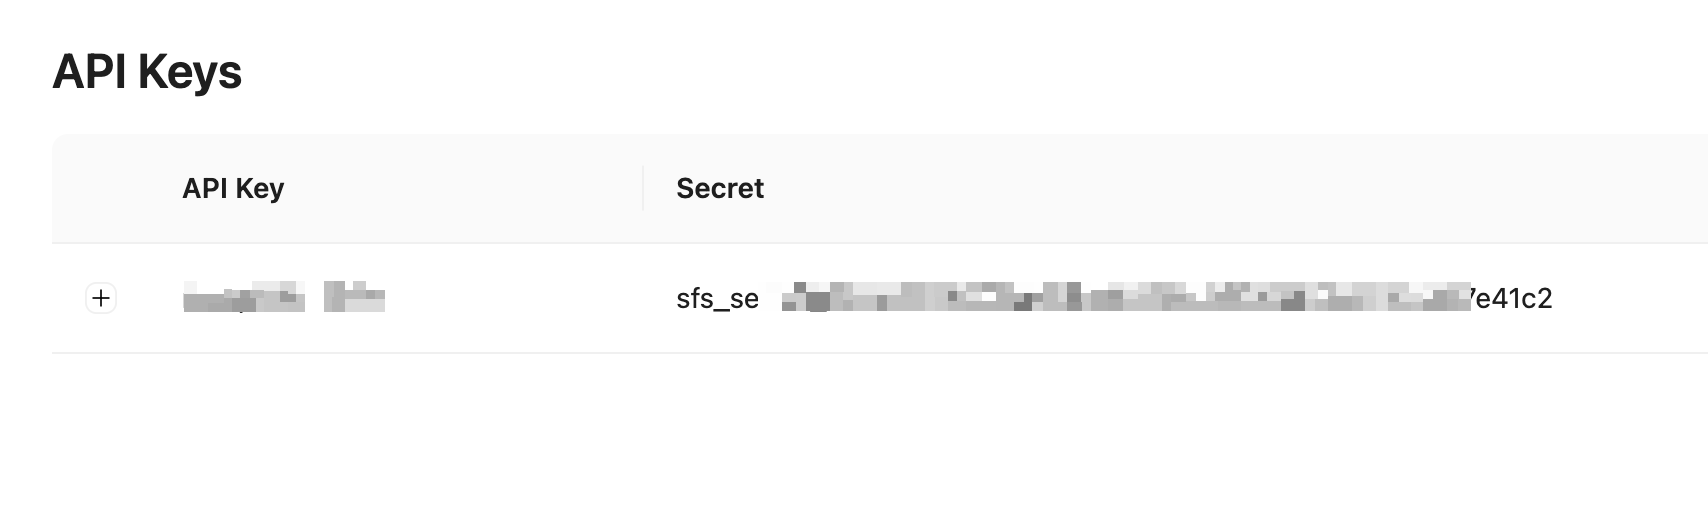
To begin using Sendforsign and gain the capability to generate documents through our infrastructure,
you need to create your SFS account. Creating a new account will automatically generate a unique API key and Secret for you.
 ## Generate a platform token
To create a new token for accessing the SFS API, first you need to call `POST /api/token` with the request body
containing the `apiKey` and `Secret` values you obtained in the previous step.
The `/api/token` endpoint does not require any authentication headers, which is in line with the OAuth 2.0 standard.
```bash cURL theme={null}
curl -X POST 'https://api.sendforsign.com/api/token' \
-H 'Content-Type: application/json' \
-d '{
"data": {
"action": "create",
"apiKey": "YOUR_API_KEY",
"secret": "YOUR_SECRET"
}
}'
```
Never store your client secret in plain text. Always treat it in a way you treat
any other passwords and API keys in your system, and use a special encrypted storage for this type of sensitive data.
The successful `201 Created` response contains the `access_token` and its validity time (in seconds):
```bash JSON theme={null}
{
"access_token": "123456789...",
"token_type": "Bearer",
"expires_in": 1800
}
```
## Handle platform token expiry
A partner token is valid only for 1800 seconds (which is 30 minutes). If you will make a request with an expired token,
SFS responds back with a **401 Unauthorized** error:
```bash JSON theme={null}
{
"message": "Token expired",
"code": 401
}
```
In your server-side code, implement a mechanism to handle this error and generate a new token,
in the same way as you did in the previous step.
[Learn more about platfrom tokens here](/api-reference/authentication#creating-platform-tokens)
## Create a client for each business that use your platform
For each client you have in your platform, you need to create a corresponding client within the
SFS platform. Here, you don't need to duplicate all the information you already have about your
customers – submit only what's required by SFS. For more information about entities, refer to
SFS [account structure](/api-reference/structure).
To create a client, make a POST request to the `/api/client` endpoint.
The request's payload represents details of the client to be created. In the header, specify the `platform Bearer token`:
```bash cURL theme={null}
curl -X POST 'https://api.sendforsign.com/api/client' \
-H 'Authorization: Bearer 123456789' \
-H 'Content-Type: application/json' \
-d '{
"data": {
"action": "create",
"client": {
"fullname": "John Johnson",
"email": "john_johnson@mail.com",
"organization": "Company Inc.",
"customKey": "YOUR_COMBINATION"
}
}
}'
```
The successful `201 OK` response contains the `clientKey`:
```bash JSON theme={null}
{
"client": {
"createTime": "2023-12-01 12:18:55",
"clientKey": "CLIENT_KEY",
},
"code": "201",
"message": "Client created"
}
```
[Learn more about client API endpoint here](/api-reference/client/create)
## Generate client tokens
A Client token is a specific token issued for an individual platform client.
These tokens allowing actions to be directly linked to specific client within your platform.
To generate a client token, call `POST /api/token`, and specify the Key of this client in `clientKey` (from the previous step)
request field, and specify the `platform Bearer token` in the header:
```bash cURL theme={null}
curl -X POST 'https://api.sendforsign.com/api/token' \
-H 'Authorization: Bearer 123456789' \
-H 'Content-Type: application/json' \
-d '{
"action": "create",
"clientKey": "YOUR_CLIENT_KEY"
}'
```
The successful `201 Created` response contains the `access_token` and its validity time (in seconds):
```bash JSON theme={null}
{
"access_token": "123456789...",
"token_type": "Bearer",
"expires_in": 1800
}
```
[Learn more about client tokens here](/api-reference/authentication#creating-client-tokens)
## Handle client token expiry
A partner token is valid only for 1800 seconds (which is 30 minutes). If you will make a request with an expired token,
SFS responds back with a **401 Unauthorized** error:
```bash JSON theme={null}
{
"message": "Token expired",
"code": 401
}
```
In your server-side code, implement a mechanism to handle this error and generate a new token,
in the same way as you did in the previous step.
Once these steps are completed, you can proceed to the client side setup.
## Generate a platform token
To create a new token for accessing the SFS API, first you need to call `POST /api/token` with the request body
containing the `apiKey` and `Secret` values you obtained in the previous step.
The `/api/token` endpoint does not require any authentication headers, which is in line with the OAuth 2.0 standard.
```bash cURL theme={null}
curl -X POST 'https://api.sendforsign.com/api/token' \
-H 'Content-Type: application/json' \
-d '{
"data": {
"action": "create",
"apiKey": "YOUR_API_KEY",
"secret": "YOUR_SECRET"
}
}'
```
Never store your client secret in plain text. Always treat it in a way you treat
any other passwords and API keys in your system, and use a special encrypted storage for this type of sensitive data.
The successful `201 Created` response contains the `access_token` and its validity time (in seconds):
```bash JSON theme={null}
{
"access_token": "123456789...",
"token_type": "Bearer",
"expires_in": 1800
}
```
## Handle platform token expiry
A partner token is valid only for 1800 seconds (which is 30 minutes). If you will make a request with an expired token,
SFS responds back with a **401 Unauthorized** error:
```bash JSON theme={null}
{
"message": "Token expired",
"code": 401
}
```
In your server-side code, implement a mechanism to handle this error and generate a new token,
in the same way as you did in the previous step.
[Learn more about platfrom tokens here](/api-reference/authentication#creating-platform-tokens)
## Create a client for each business that use your platform
For each client you have in your platform, you need to create a corresponding client within the
SFS platform. Here, you don't need to duplicate all the information you already have about your
customers – submit only what's required by SFS. For more information about entities, refer to
SFS [account structure](/api-reference/structure).
To create a client, make a POST request to the `/api/client` endpoint.
The request's payload represents details of the client to be created. In the header, specify the `platform Bearer token`:
```bash cURL theme={null}
curl -X POST 'https://api.sendforsign.com/api/client' \
-H 'Authorization: Bearer 123456789' \
-H 'Content-Type: application/json' \
-d '{
"data": {
"action": "create",
"client": {
"fullname": "John Johnson",
"email": "john_johnson@mail.com",
"organization": "Company Inc.",
"customKey": "YOUR_COMBINATION"
}
}
}'
```
The successful `201 OK` response contains the `clientKey`:
```bash JSON theme={null}
{
"client": {
"createTime": "2023-12-01 12:18:55",
"clientKey": "CLIENT_KEY",
},
"code": "201",
"message": "Client created"
}
```
[Learn more about client API endpoint here](/api-reference/client/create)
## Generate client tokens
A Client token is a specific token issued for an individual platform client.
These tokens allowing actions to be directly linked to specific client within your platform.
To generate a client token, call `POST /api/token`, and specify the Key of this client in `clientKey` (from the previous step)
request field, and specify the `platform Bearer token` in the header:
```bash cURL theme={null}
curl -X POST 'https://api.sendforsign.com/api/token' \
-H 'Authorization: Bearer 123456789' \
-H 'Content-Type: application/json' \
-d '{
"action": "create",
"clientKey": "YOUR_CLIENT_KEY"
}'
```
The successful `201 Created` response contains the `access_token` and its validity time (in seconds):
```bash JSON theme={null}
{
"access_token": "123456789...",
"token_type": "Bearer",
"expires_in": 1800
}
```
[Learn more about client tokens here](/api-reference/authentication#creating-client-tokens)
## Handle client token expiry
A partner token is valid only for 1800 seconds (which is 30 minutes). If you will make a request with an expired token,
SFS responds back with a **401 Unauthorized** error:
```bash JSON theme={null}
{
"message": "Token expired",
"code": 401
}
```
In your server-side code, implement a mechanism to handle this error and generate a new token,
in the same way as you did in the previous step.
Once these steps are completed, you can proceed to the client side setup.