 ## Create a client for each business that use your platform
For each client you have in your platform, you need to create a corresponding client within the
SFS platform. Here, you don't need to duplicate all the information you already have about your
customers – submit only what's required by SFS. For more information about entities, refer to
SFS [account structure](/api-reference/structure).
To create a client, make a POST request to the `/api/client` endpoint.
The request's payload represents details of the client to be created. In the header, specify the `platform Bearer token`:
```bash cURL theme={null}
curl -X POST 'https://api.sendforsign.com/api/client' \
-H 'X-Sendforsign-Key: YOUR_API_KEY' \
-H 'Content-Type: application/json' \
-d '{
"data": {
"action": "create",
"client": {
"fullname": "John Johnson",
"email": "john_johnson@mail.com",
"organization": "Company Inc.",
"customKey": "YOUR_COMBINATION"
}
}
}'
```
The successful `201 OK` response contains the `clientKey`:
```bash JSON theme={null}
{
"client": {
"createTime": "2023-12-01 12:18:55",
"clientKey": "CLIENT_KEY",
},
"code": "201",
"message": "Client created"
}
```
[Learn more about client API endpoint here](/api-reference/client/create)
## Map your platform clients to the created clients
Use the Client keys you generated to map them to the clients that use your platform,
so every time a client logs into your system, you can retrieve the corresponding client key
to access Sendforsign's infrastructure.
## Allow your users to create contracts within your platform
Now that you have a Client key for each of your clients, you can allow them to create new documents,
send them for signing, and much more. There are multiple ways to enable your users to create documents.
The easiest way to do this is to add a [Contract List](/sdk/components/contractlist) component to your interface. Learn how to use
Sendforsign Components [here.](/sdk/introsdk)
Once the component is added and the Client key is populated, your clients will see all the documents they have
created and will have the ability to create new ones directly from this component.
## Create a client for each business that use your platform
For each client you have in your platform, you need to create a corresponding client within the
SFS platform. Here, you don't need to duplicate all the information you already have about your
customers – submit only what's required by SFS. For more information about entities, refer to
SFS [account structure](/api-reference/structure).
To create a client, make a POST request to the `/api/client` endpoint.
The request's payload represents details of the client to be created. In the header, specify the `platform Bearer token`:
```bash cURL theme={null}
curl -X POST 'https://api.sendforsign.com/api/client' \
-H 'X-Sendforsign-Key: YOUR_API_KEY' \
-H 'Content-Type: application/json' \
-d '{
"data": {
"action": "create",
"client": {
"fullname": "John Johnson",
"email": "john_johnson@mail.com",
"organization": "Company Inc.",
"customKey": "YOUR_COMBINATION"
}
}
}'
```
The successful `201 OK` response contains the `clientKey`:
```bash JSON theme={null}
{
"client": {
"createTime": "2023-12-01 12:18:55",
"clientKey": "CLIENT_KEY",
},
"code": "201",
"message": "Client created"
}
```
[Learn more about client API endpoint here](/api-reference/client/create)
## Map your platform clients to the created clients
Use the Client keys you generated to map them to the clients that use your platform,
so every time a client logs into your system, you can retrieve the corresponding client key
to access Sendforsign's infrastructure.
## Allow your users to create contracts within your platform
Now that you have a Client key for each of your clients, you can allow them to create new documents,
send them for signing, and much more. There are multiple ways to enable your users to create documents.
The easiest way to do this is to add a [Contract List](/sdk/components/contractlist) component to your interface. Learn how to use
Sendforsign Components [here.](/sdk/introsdk)
Once the component is added and the Client key is populated, your clients will see all the documents they have
created and will have the ability to create new ones directly from this component.
 ## Create contracts via API and let users work with them
Although the previous method is the easiest way to enable your users to start working with contracts,
it often happens that you need to generate contracts from your backend, enrich them with your own data, and
then let your users work with them.
Let's create a contract first via an API call and add some placeholders so users can
insert them into the contract afterwards.
```bash cURL theme={null}
curl -X POST 'https://api.sendforsign.com/api/contract' \
-H 'X-Sendforsign-Key: YOUR_API_KEY' \
-H 'Content-Type: application/json' \
-d '{
"data": {
"action": "create",
"clientKey": "CLIENT_KEY",
"contract": {
"name": "A test contract",
"value": "
## Create contracts via API and let users work with them
Although the previous method is the easiest way to enable your users to start working with contracts,
it often happens that you need to generate contracts from your backend, enrich them with your own data, and
then let your users work with them.
Let's create a contract first via an API call and add some placeholders so users can
insert them into the contract afterwards.
```bash cURL theme={null}
curl -X POST 'https://api.sendforsign.com/api/contract' \
-H 'X-Sendforsign-Key: YOUR_API_KEY' \
-H 'Content-Type: application/json' \
-d '{
"data": {
"action": "create",
"clientKey": "CLIENT_KEY",
"contract": {
"name": "A test contract",
"value": "Hello World!
" }, "placeholders": [ { "name": "Occupation", "value": "Designer" }, { "name": "Duties", "value": "Website updates" } ] } }' ``` The contract has been created, and the placeholders have been placed in the contract sidebar. You can now render this contract using the [Contract Editor](/sdk/components/contracteditor) component.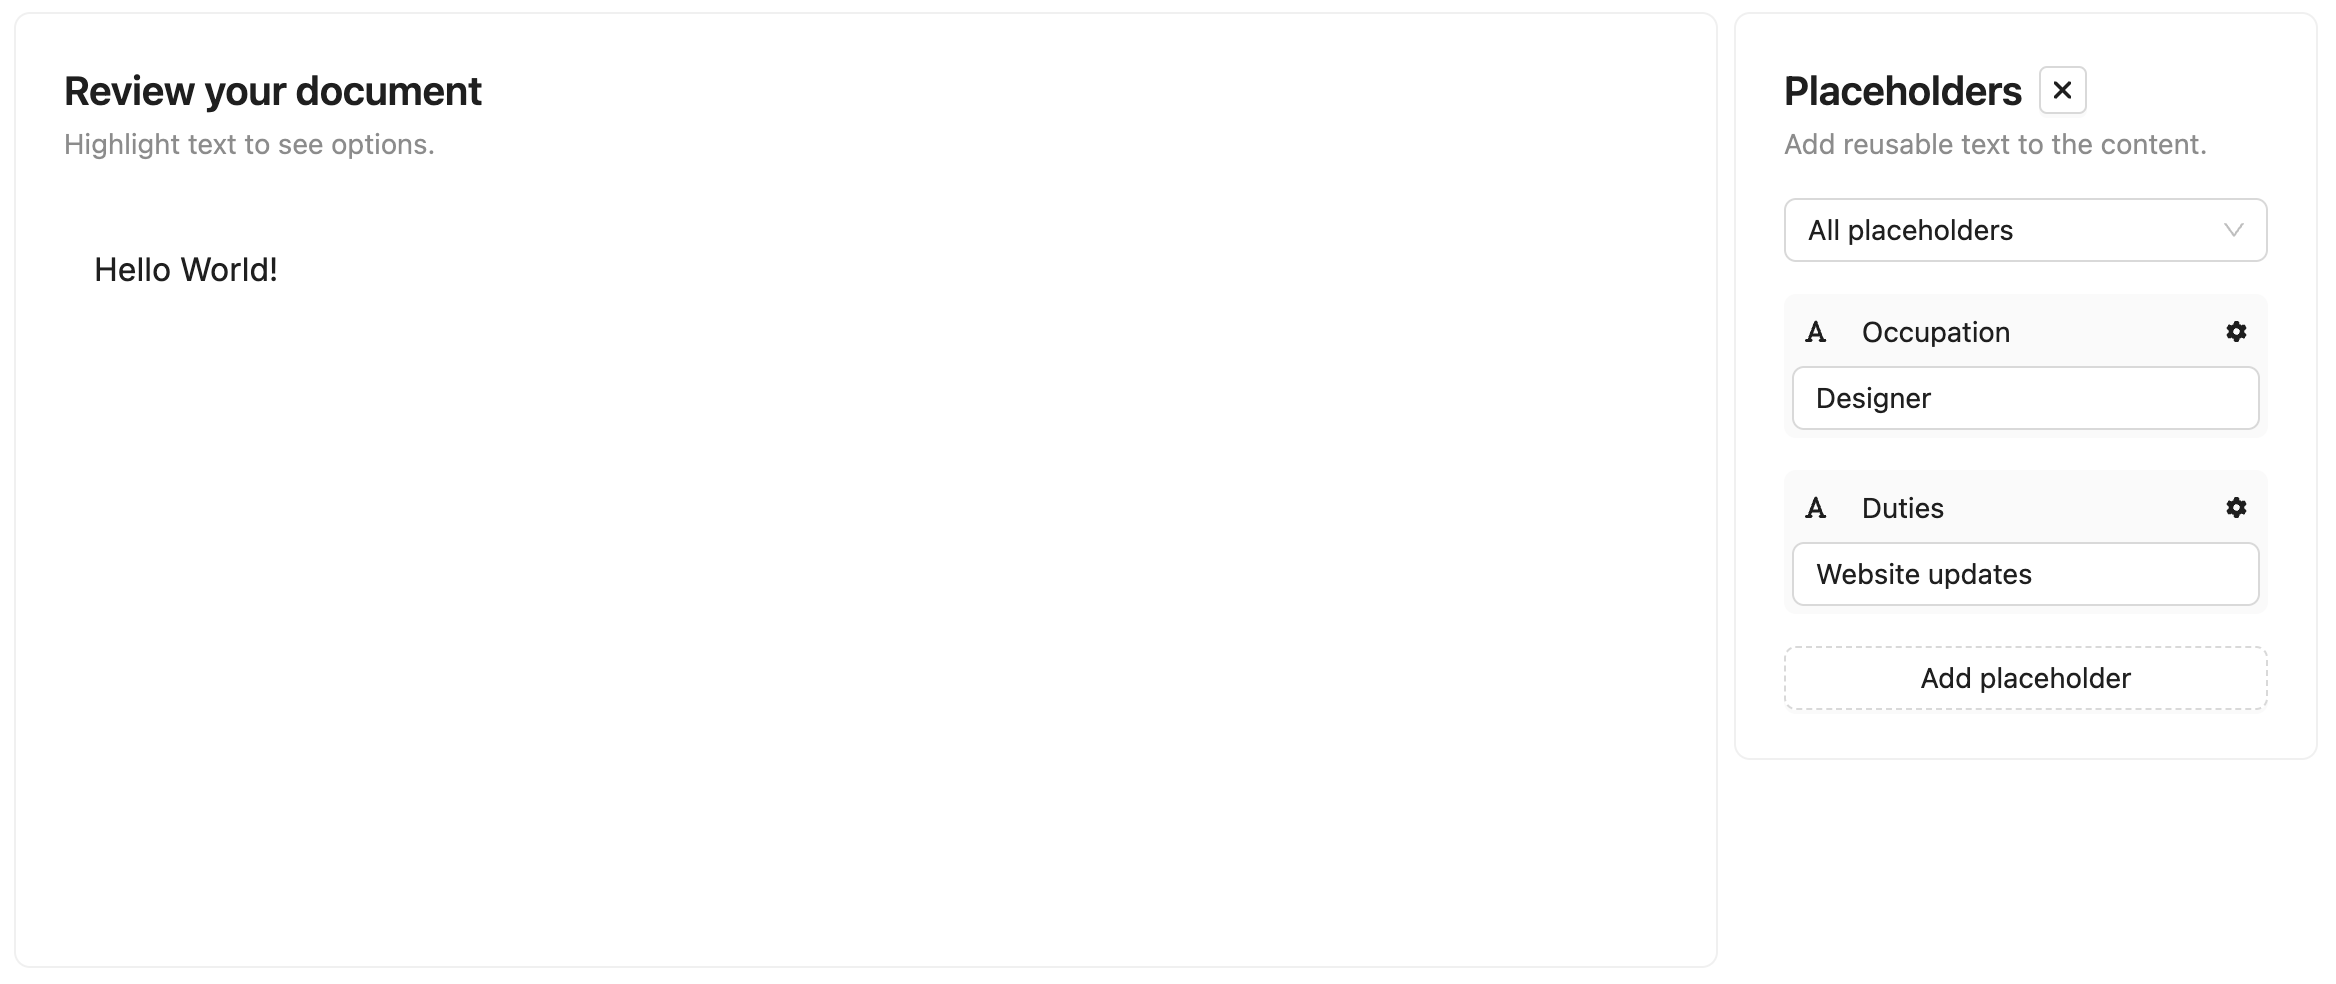 ## Allow users to recreate documents
In some cases, you may need to allow users to recreate the content of documents that already exist —
either by uploading their own Word/PDF file or selecting a template.
In such cases, you should use the `canReDraft`=`true` property of the [Contract Editor](/sdk/components/contracteditor).
This enables users to start the creation process from scratch for a document that already exists.
If the existing document already has placeholders included, the system will also route these flows accordingly:
* If a user uploads a Word/PDF file or creates a document from scratch, the placeholders will remain untouched.
* If a user selects a template that does not contain placeholders, then the placeholders will remain untouched,
and the content will be populated from the selected template.
* If a user selects a template that already contains placeholders, then the system will do the following:
1. Populate the content from the template into the document.
2. Read all the placeholders from the template and all the placeholders from the document and merge them. For
placeholders with the same names (on the template side and on the document side), the system will transfer the
values from the document's placeholders to the template's placeholders.
3. Document-side placeholders that don't match any placeholder on the template side will remain untouched.
So, for example, if you have a document with a placeholder `Name1` and value `DocValue1`, and a template with placeholders
`Name1` and value `TempValue1` and `Name2` and value `TempValue2`, the resulting document will contain the content from the template and
two placeholders: `Name1-DocValue1` and `Name2-TempValue2`.
## Allow users to recreate documents
In some cases, you may need to allow users to recreate the content of documents that already exist —
either by uploading their own Word/PDF file or selecting a template.
In such cases, you should use the `canReDraft`=`true` property of the [Contract Editor](/sdk/components/contracteditor).
This enables users to start the creation process from scratch for a document that already exists.
If the existing document already has placeholders included, the system will also route these flows accordingly:
* If a user uploads a Word/PDF file or creates a document from scratch, the placeholders will remain untouched.
* If a user selects a template that does not contain placeholders, then the placeholders will remain untouched,
and the content will be populated from the selected template.
* If a user selects a template that already contains placeholders, then the system will do the following:
1. Populate the content from the template into the document.
2. Read all the placeholders from the template and all the placeholders from the document and merge them. For
placeholders with the same names (on the template side and on the document side), the system will transfer the
values from the document's placeholders to the template's placeholders.
3. Document-side placeholders that don't match any placeholder on the template side will remain untouched.
So, for example, if you have a document with a placeholder `Name1` and value `DocValue1`, and a template with placeholders
`Name1` and value `TempValue1` and `Name2` and value `TempValue2`, the resulting document will contain the content from the template and
two placeholders: `Name1-DocValue1` and `Name2-TempValue2`.